Part4-React+Antd+TS开发后台界面

一、CMS后台管理系统创建

本项目采用React+Ant Design+TypeScript开发,React主要使用Function Component的形式做开发,结合路由与请求实现。

1、创建React项目

由于项目结合ts与antd开发,因此请使用以下方式创建项目并安装依赖:

# 创建名为cms-manage的项目
$ npx create-react-app cms-manage --template typescript
# 或者
$ yarn create react-app cms-manage --template typescript

# 添加antd
npm install antd --save
# 或
yarn add antd

# 添加axios
npm install axios --save
# 或
yarn add axios

清空src下所有的内容,并且新建App.tsx与index.tsx,代码如下:

// App.tsx
import React from "react";

export default function App() {
  return (
    <div>
      <h2>App</h2>
    </div>
  );
}

// index.tsx
import ReactDOM from 'react-dom'
import App from './App'
import 'antd/dist/antd.css';	// 引入antd的样式

ReactDOM.render(
  <App />,
  document.getElementById("root")
)

先把项目跑起来:

$ npm run start

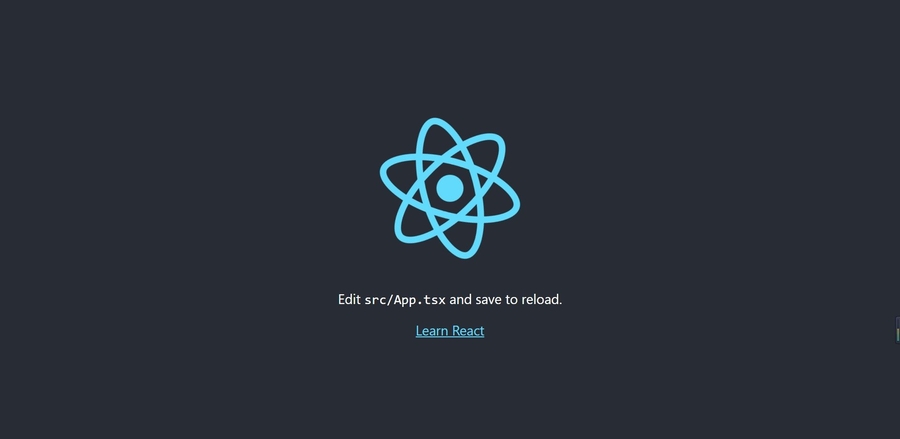
看到跑起来的界面即可。

2、Antd组件

打开Antd的官网:https://ant.design/index-cn

在App.tsx中:

import React, { FC } from "react";
import { Button } from 'antd';

const App: FC = () => (
  <div>
    <Button type="primary">Button</Button>
  </div>
)

export default App;

3、解包

解包之前必须做Git提交

a. Git提交

$ git add .
$ git commit -m 'xxx'
$ git remote origin xxxx
$ git push origin master

b. 解包

$ npm run eject

解包后项目根目录出现config文件夹,代表解包成功。

4、配置Less

a. 安装Less

$ npm install less less-loader@6.0.0 --save-dev
# 或
$ yarn add less less-loader@6.0.0

b. Webpack配置

找到 webpack.config.js ,搜索 sassModuleRegex 后,在其下方添加:

module: {
    ...,
    // less加载器 
    {
        test: /\.less$/,
        use: getStyleLoaders(
            {
                //暂不配置
            },
            'less-loader'
        ),
    },
}

修改了配置文件,记得重新 yarn start 哦!

c. Less测试

删掉 index.tsx 中的 antd.css 引入,在src下新建 App.less

@import '~antd/dist/antd.css';

@bg: #efefef;

body{
    background: @bg;
}

#root{
    font-size: 14px;
    font-family: NotoSansHans;
    color: #333333;
}

a{
    color: #333333;
    text-decoration: none;
}

注意:以上顺便把文字三属性等基本配置写了

然后在 App.tsx 中引入:

import "./App.less";

打开看到页面样式发生变化,即代表Less测试成功。

5、tsconfig

打开 tsconfig.json,修改下面出现的字段:

{
  "compilerOptions": {
    "target": "ESNext",
    "baseUrl": "./src",
    "jsx": "preserve"
  }
}

baseUrl配置其指向src,所有的相对路径都可以直接从src下的文件或文件夹写起,如:

// 原本的引入
import App from './App'

// 现在的引入
import App from 'App'

6、搭建基本页面结构(直接套用)

为了节省基本的布局时间,请直接使用这个基本布局:

a. 布局

App.tsx 使用Layout布局:

import React from "react";
import { Layout, Breadcrumb, Menu } from "antd";
import { EditOutlined, TeamOutlined, AccountBookOutlined, ReadOutlined, SelectOutlined } from "@ant-design/icons";
// import { useNavigate } from "react-router-dom";
import logo from "assets/images/logo.png";
import "App.less";

const { Header, Footer, Sider, Content } = Layout;
const { SubMenu } = Menu;

const App = () => {
  // const navigate = useNavigate();
    
  const menu = (
    <Menu>
      <Menu.Item key="n">退出登录</Menu.Item>
    </Menu>
  );  
  
  return (
    <Layout>
      <Header className="header">
        <img src={logo} alt="" className="logo" />
        <Dropdown overlay={menu} onVisibleChange={() => setVisible(!visible)} visible={visible}>
          <a className="ant-dropdown-link" onClick={(e) => e.preventDefault()}>
            <img className="avatar" src="http://codesohigh.com/images/logo.png" alt="" />
            <span>你单排吧</span>
            <CaretDownOutlined />
          </a>
        </Dropdown>
      </Header>
      <Layout>
        <Sider
          theme="dark"
          style={{
            overflow: "auto",
            height: "100vh",
            position: "fixed",
            left: 0,
          }}
        >
          <Menu theme="dark" mode="inline" defaultSelectedKeys={["1"]}>
            <SubMenu key="sub1" icon={<TeamOutlined />} title="小编">
              <Menu.Item key="1" icon={<EditOutlined />}>
                文章编辑
              </Menu.Item>
              <Menu.Item key="2" icon={<ReadOutlined />}>
                查看文章列表
              </Menu.Item>
            </SubMenu>
            <SubMenu key="sub2" icon={<TeamOutlined />} title="管理员">
              <Menu.Item key="3" icon={<EditOutlined />}>
                文章编辑
              </Menu.Item>
              <Menu.Item key="4" icon={<ReadOutlined />}>
                查看文章列表
              </Menu.Item>
              <Menu.Item key="5" icon={<SelectOutlined />}>
                小编名单
              </Menu.Item>
            </SubMenu>
            <SubMenu key="sub3" icon={<AccountBookOutlined />} title="超级管理员">
              <Menu.Item key="6" icon={<EditOutlined />}>
                文章编辑
              </Menu.Item>
              <Menu.Item key="7" icon={<ReadOutlined />}>
                查看文章列表
              </Menu.Item>
              <Menu.Item key="8" icon={<SelectOutlined />}>
                小编名单
              </Menu.Item>
              <Menu.Item key="9" icon={<TeamOutlined />}>
                管理员名单
              </Menu.Item>
            </SubMenu>
          </Menu>
        </Sider>
        <Content className="content">
          <Breadcrumb style={{ margin: "16px 0" }}>
            <Breadcrumb.Item>首页</Breadcrumb.Item>
            <Breadcrumb.Item>文章编辑</Breadcrumb.Item>
          </Breadcrumb>
          <section className="content_main">
            {/* 在此处渲染页面内容 */}
           </section>
        </Content>
      </Layout>
      <Footer className="footer">Respect | Copyright © 2022 Author 你单排吧</Footer>
    </Layout>
  );
};

export default App;

b. 样式

App.less 中进行修改:

@import '~antd/dist/antd.css';

@bg: #efefef;

body {
    background: @bg;
}

#root {
    font-size: 14px;
    font-family: NotoSansHans;
    color: #333333;
}

a {
    color: #333333;
    text-decoration: none;
}

.header {
    background: #fff;
    display: flex;
    justify-content: space-between;
    align-items: center;
    .logo{
        width: 220px;
        height: 50px;
        cursor: pointer;
    }
    .avatar{
        width: 40px;
        height: 40px;
        margin-right: 10px;
        border-radius: 50%;
        cursor: pointer;
    }
}

.footer {
    background: #001529;
    position: fixed;
    bottom: 0;
    left: 0;
    width: 100%;
    color: #fff;
    text-align: center;
}

.ant-menu-item {
    margin-top: 0 !important;
}

.content {
    margin-left: 200px;
    padding: 0 20px;
}

.content_main {
    background: #fff;
    // 100vh减掉header、breadcrumb、footer高度后,减掉20px作为高度
    height: calc(100vh - 188px - 20px);
    overflow-y: scroll;
    width: 100%;
    padding: 20px;
    box-sizing: border-box;
}

.content_main::-webkit-scrollbar {
    /*滚动条整体样式*/
    width: 10px;
    height: 100%;
    background: #fff;
    border-radius: 10px;
}

.content_main::-webkit-scrollbar-track {
    /*滚动条里面轨道*/
    box-shadow: inset 0 0 5px rgba(0, 0, 0, 0.2);
    border-radius: 10px;
    background: #EDEDED;
}

.content_main::-webkit-scrollbar-thumb {
    /*滚动条里面小方块*/
    border-radius: 10px;
    box-shadow: inset 0 0 5px rgba(0, 0, 0, 0.2);
    background: #535353;
}

二、路由

1、路由安装

安装最新版本的路由:

$ npm i react-router-dom

2、路由统一配置

在src下创建 router/index.jsx

import { Routes, Route, BrowserRouter as Router } from "react-router-dom";
import React, { Suspense, lazy } from "react";
import App from "App";

interface Iroute {
  path: string;
  component: React.FC;
  children?: Iroute[];
}

let routeArr: Iroute[] = [
  {
    path: "/",
    component: App,
    children: [
      { path: "edit", component: lazy(() => import("../views/Edit")) },
      { path: "list", component: lazy(() => import("../views/List")) },
    ],
  },
  { path: "/login", component: lazy(() => import("../views/Login")) },
  { path: "/register", component: lazy(() => import("../views/Register")) },
];

const MyRouter = () => (
  <Router>
    <Suspense fallback={<div>loading...</div>}>
      <Routes>
        {
          routeArr.map((item, index) => (
            <Route key={index} path={item.path} element={<item.component />}></Route>
          ))
        }
      </Routes>
    </Suspense>
  </Router>
);

export default MyRouter;

3、入口文件配置

src/index.tsx 引入路由组件:

import ReactDOM from 'react-dom'
import Router from 'router'

ReactDOM.render(
  <Router />,
  document.getElementById("root")
)

4、路由API

React-router-dom有很多新的API。

a. 获取路由地址与参数

import { useLocation, useParams } from "react-router-dom";

const location = useLocation();   // 获取location,即可得到state中的参数
let params = useParams();		  // 获取地址栏携带的参数xxx: /list/xxx

b. 父组件展示路由对应的子组件

import { Outlet } from "react-router-dom";

<Outlet />

c. 页面跳转

import { useNavigate } from "react-router-dom";

let navigate = useNavigate();
navigate('/xxx')

三、富文本编辑器WangEditor

这里提供官网文档:https://www.wangeditor.com/doc/

a. 安装

$ npm i wangeditor --save

b. Editor组件封装

这个富文本编辑器请直接使用代码,没必要再自己手写一次。

注意:这里使用的是jsx语法。

src/components 目录下创建 Editor.jsx 文件:

import { useEffect, useState } from 'react';
import { PageHeader, Button } from 'antd';
import E from 'wangeditor'

let editor = null
const Editor = () => {
  const [content, setContent] = useState("");

  useEffect(() => {
    // 实例化
    editor = new E("#myeditor")

    editor.config.onchange = (newHtml) => {
      setContent(newHtml);
    }

    // 创建
    editor.create()

    return () => {
      // 组件销毁时销毁编辑器
      editor.destroy()
    }
    // eslint-disable-next-line
  }, [])

  return (
    <div className="editor">
      <PageHeader
        style={{padding: 0, marginBottom: '20px'}}
        ghost={false}
        title="文章编辑"
        subTitle={`当前日期:${new Date().getFullYear()}-${new Date().getMonth()}-${new Date().getDate()}`}
        extra={[
          <Button key="3" type="primary">提交文章</Button>,
        ]}
      ></PageHeader>
      <div id="myeditor"></div>
    </div>
  );
}

export default Editor;

c. 调用

直接在父级组件中调用:

import Editor from "components/Editor";

<Editor />

注意:父组件无论jsx或是tsx,都可以直接调用。

最后更新于